IMPORTANT NOTE: Currently Opened metrics are not able to be displayed. This is because of a change that email providers have made that doesn’t allow the pixel placed in the email to trigger the Infusionsoft automation link that applies the Opened tag, therefore not allowing us to track opens that have already gone through.
In this article we’ll cover how to track email opens in an Infusionsoft campaign sequence.
How to Track Opens in Infusionsoft
Now we’ve already added opened tags in a previous article detailing the process for the Drag & Drop Builder, as well as the HTML Builder. You can find that article here if you need to add those tags.
Automation Links
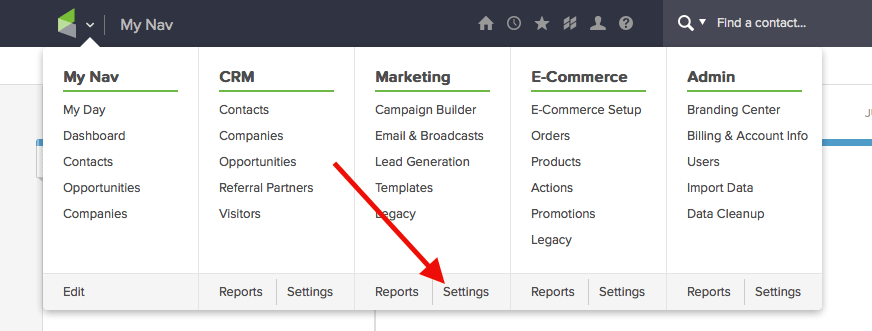
Let’s begin by hovering over the Infusionsoft icon and clicking on the the Marketing “Settings“.
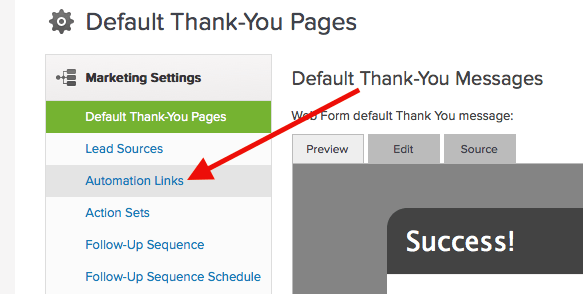
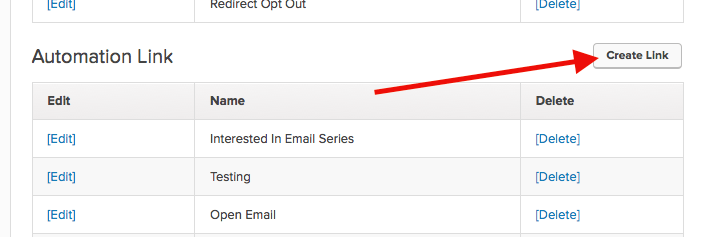
Under the Marketing Settings click on “Automation Links“. Once there, we need to create a new link under the Automation Link section.
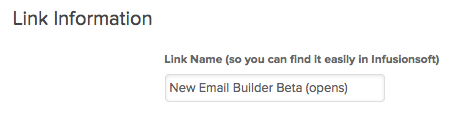
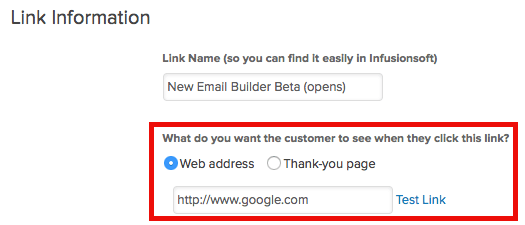
Here is where you’ll give it a name. I’ve named it “New Email Builder Beta (opens)”.
Adding the Redirect URL
The first thing it asks us is what we want the customer to see when they click this link, but they won’t actually be clicking on the link. Because of that, they won’t be redirected to what we set. However, the setting is still important to us.
We don’t want to leave it as the default thank-you page, because that page will load every time the email is opened. Since that page is linked to your Infusionsoft account, it can put a lot of unnecessary strain on your Infusionsoft application. Therefore, you can get around this by choosing the web address option. We recommend you use the Google homepage address because they have fast load times and deep pockets.
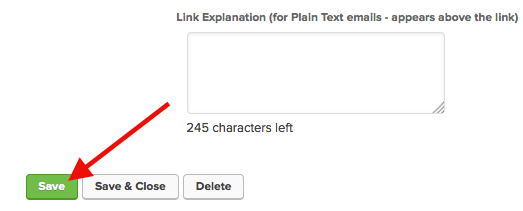
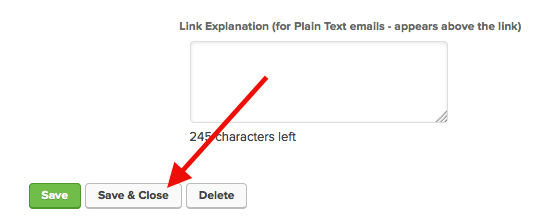
Then you should leave the link text blank and then click “Save“. You will have to click “Save” for this Actions tab to show up.
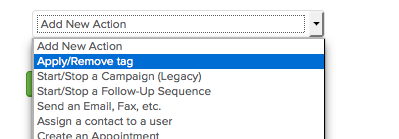
Afterwards, go to actions and select “Apply tag”.
Scroll to the opened tag that you would like to be applied for this email and click on it. Then click “Save”.
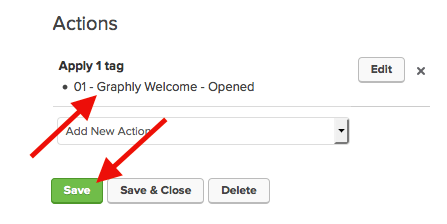
After you’ve done that, click “Save and Close”.
Getting the Automation Link Id
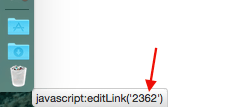
It should now show up at the bottom of your Automation Links. You will need to get the Id of this automation link. To do so just hover over the “[Edit]” link and look in the lower left-hand corner of the browser, it says editLink(“XXXX”). So whatever is in place of the X’s is our Id. Go ahead and copy, or write it down.
![It should now show up at the bottom of your Automation Links. You will need to get the Id of this automation link. To do so just hover over the "[Edit]" link and look in the lower left-hand corner of the browser](https://graphly.io/wp-content/uploads/10-3.png)
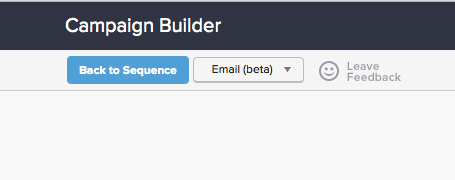
Campaign Builder
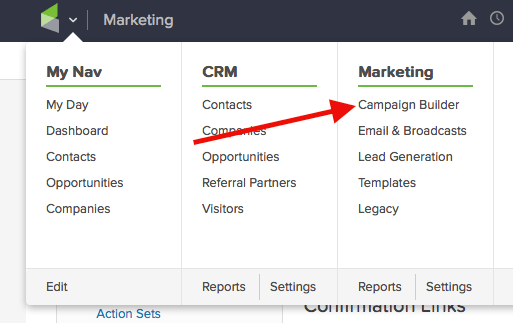
Now that we have the Id, let’s hover over the Infusionsoft icon, and click on “Campaign Builder” under Marketing,.
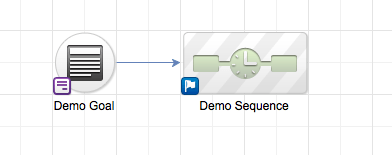
Then get into a campaign and you can either add a new sequence or edit an existing one.
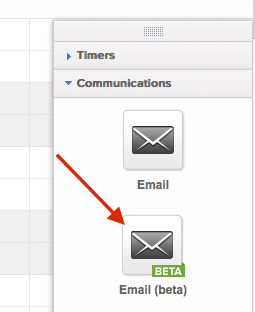
Look under the Communications tab and select Email.
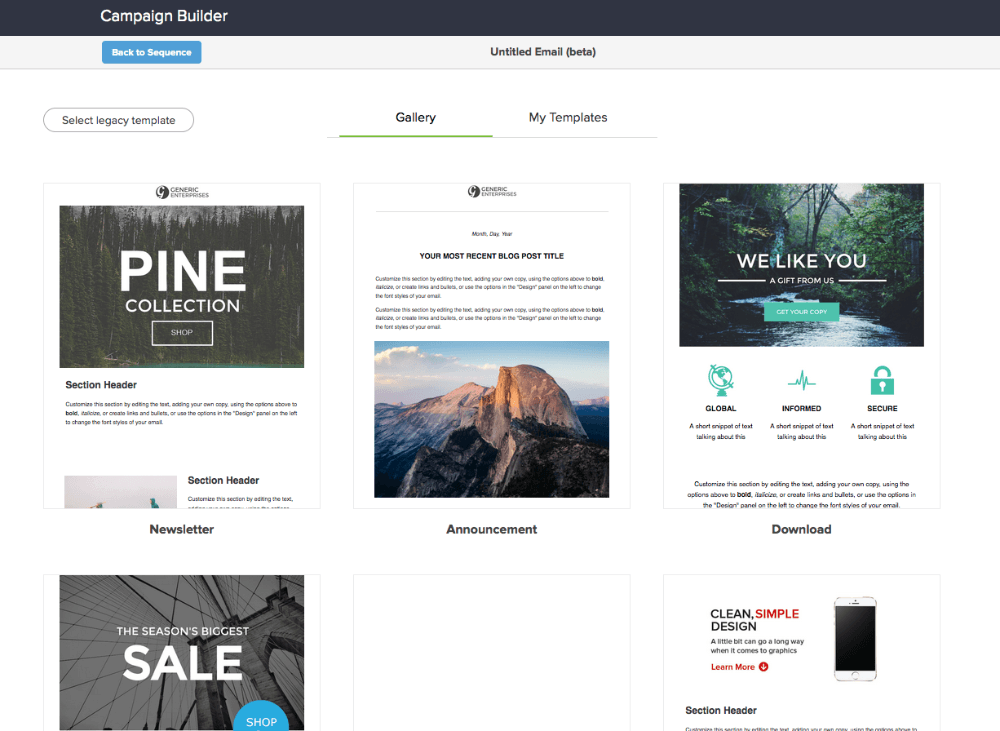
Double click to edit the email. Then you’ll be presented with numerous template options. Any of them will work, therefore, choose one and click on “use template“.
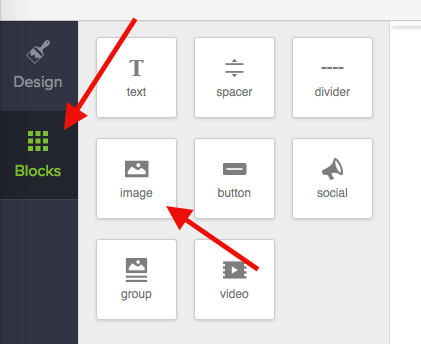
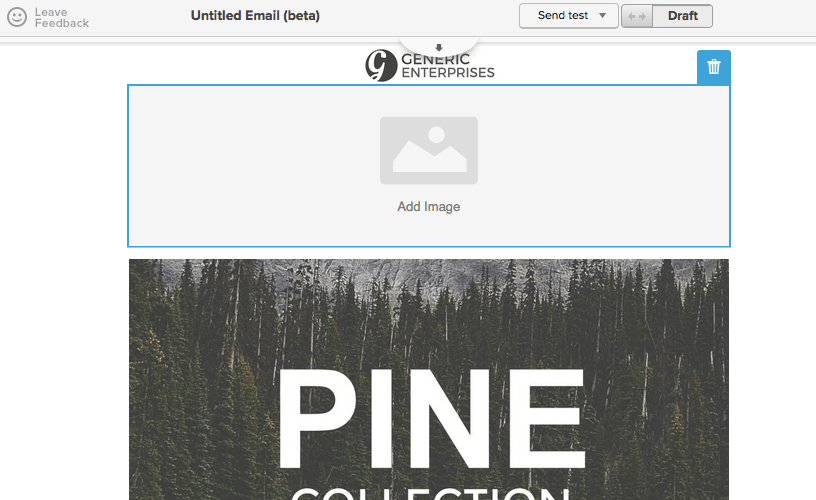
Click on “Blocks” and grab an image, putting it right above the main image.
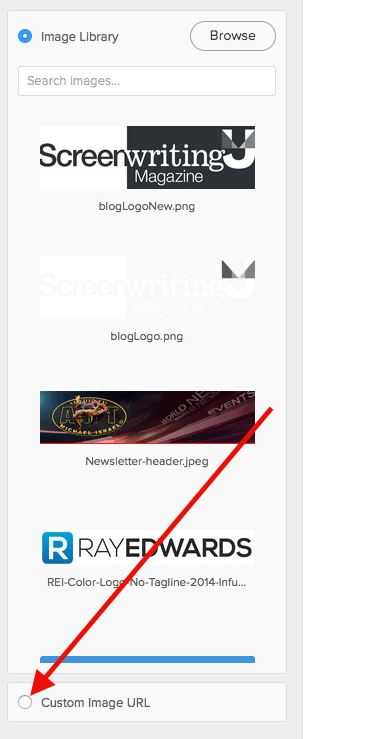
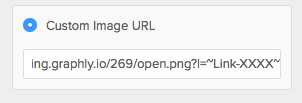
Then you’ll need to switch the radio button to Custom Image URL.
Setup to Track Opens in Graphly
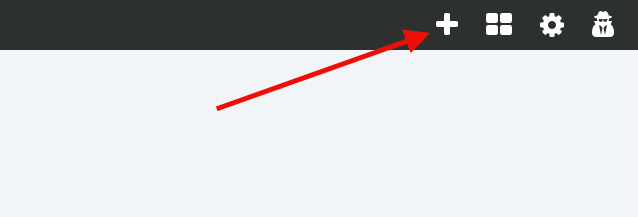
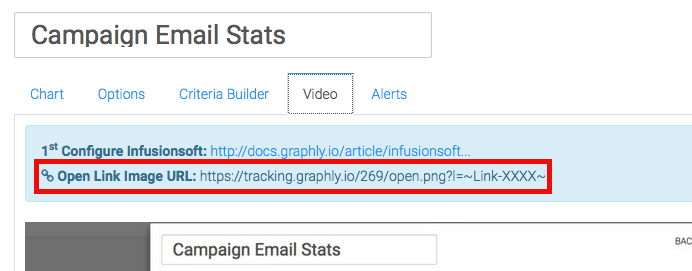
To obtain your personal tracking URL, login to your active Graphly account and click on the “add widget” button.
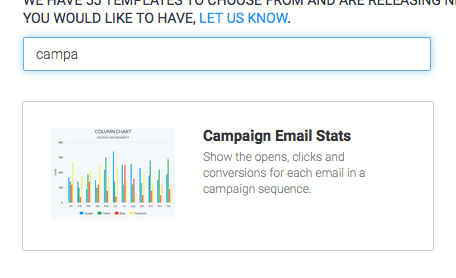
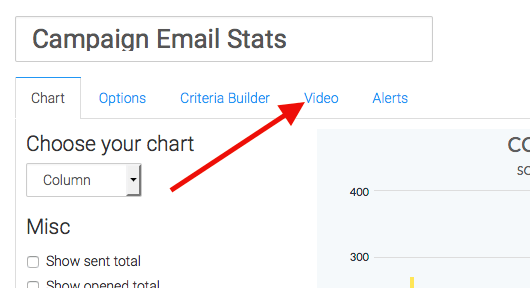
Then choose any of our campaign email widgets and go to the video tab.
Here is your unique link. This link will only work in the Infusionsoft account attached to your active Graphly account. Go ahead and copy it.
Back to Infusionsoft
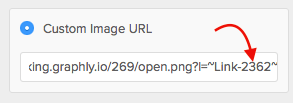
Return to the email builder and paste it into the source field. We’re almost done. Remember that automation link id? We’ll replace the 4 x’s with our Id.
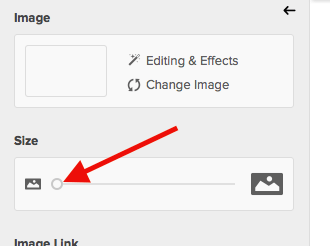
Now this is going to look like a huge amount of space is still being taken up, however, just know that we display a transparent 1×1 pixel image so when you send the email, everything will look completely normal. If it makes you feel better you can click the image, and drag the size down to 5%, which is nice so that it’s not taking up so much space in the editor.
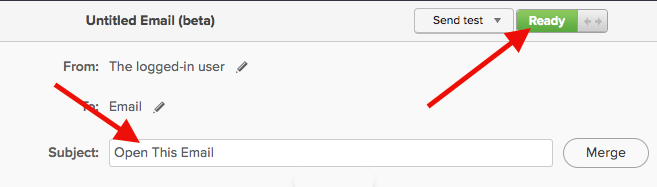
Now add a subject and mark it as ready.
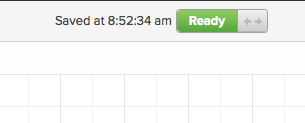
Hit “Back to Sequence” and mark it as Ready.
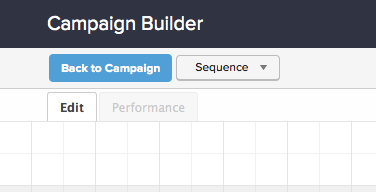
Click “Back to Campaign”, and Publish.
Final thoughts, keep in mind that the open metric pails in significance to the click metric. Not only is it less important, but it has more margin for error. Images load as people flash through their inbox clicking, delete, delete, delete. And some inboxes don’t load images by default. So it’s an estimate.
Clicks are really where it’s at. But we care enough about opens because they provide a baseline to help us understand if a From address, a subject line, or the first x characters of the email; which can usually be viewed as a preview, are causing opens. It helps us know whether or not we need to adjust any of those to increase opens. It’s definitely worth the extra minute to have the data.
Summarizing the steps in our implementation: create an automation link for every email in your campaign, add an image block, and insert the automation link Id into the image source URL that you obtain from Graphly.
Relevant Articles
- Setting Up Email Reporting in Infusionsoft’s Campaign Builder
- How to Set Up the Campaign Email Stats Report
Create Your Free Graphly Dashboard
You don’t need to struggle to find the data you need from your Infusionsoft or Keap application. Create a free visual dashboard using the Graphly Lite plan. Using Graphly Lite, you get 1 user, 2 dashboards, and access to our 10 most widely used report templates. These templates include:
- Tags Applied
- Tags Applied Goal
- Leads
- Gross Revenue
- Appt | Note | Task Summary
- Email List Health
- Refunds
- Campaign Email Stats
- Text Widget Area
If you don’t already have a Graphly account, click here to get a Graphly Lite account so you can start making more informed decisions and grow your business.